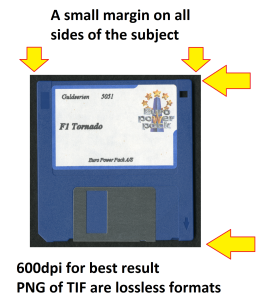
In the need of preserving retro hardware as well as software + packages etc, there’s usually a lot of confusion on how and what to scan. This page should partially give the information needed to make good scans.
1. NEVER put something against the edge of the scanner, all scanners I’ve seen and used crop approx 2mm from that edge.
2. ALWAYS make sure you scan with a margin surrounding the subject.
 3. Keep the glass plate clean. Use a dry cloth to remove dust.
4. Keep the subject clean, using a dry cloth, or on CD media a water moisted cloth, and make sure you wipe off the water.
5. Make sure the subject is touching the glass plate. If it’s flat, put something heavy on top of the subject, like a pack of printer paper. If it’s a box, use your fingers/hands to press down.
6. NEVER use driver/software enhancement like whitebalancing, colour correction etc. when scanning.
7. Scan in 600dpi (1200dpi is also doable but for most parts overkill, and some programs even crash when working with this large files) – Data storage and internet speeds today can handle the large amount of data.
8. Scan in a lossless format only. PNG or TIFF (lzw compression for color/gray, G4 Fax (CCITT.6) for black/white or you can choose no compression) stay away lossy formats like JPG
9. Scanning booklets with clamped spines, remove the clamps if possible.
10. Use a program that can batch scan. Sane for *nix, and Irfanview for Windows (sorry I don’t know about MAC OS). Windows 10 has a very ![]() simple but very easy and useful scanning app, which can scan to both PNG and TIFF.
simple but very easy and useful scanning app, which can scan to both PNG and TIFF.
11. For subjects that are too large on the scanner, make sure that your scans overlap the previous scan where it was flattened on the glass. This will make a more perfect seamless stitching.
12. Put something black behind papers that -when scanned- can see the text of the opposite side.
13. If you encounter something that isn’t covered above, don’t hesitate to ask.
